
“Organic Flare”: Aurifil/OLFA Slice and Stitch Project

The moment I saw this OLFA chenille cutter, I was completely excited to play with it! I love texture and trying new things, and this cutter meant I’d get to satisfy both of these.

I worked with the Aurifil thread set “Earth Views” by Karen Nyberg, an astronaut who was inspired by the colors seen below her while in space. I wanted my finished art quilt to have an organic, Earthy feel to it as well. I’ll teach you how I made my quilt, so you can make one of your own!

Start with a background piece that measures 8” x 21”. This is the piece that will peek through when you make your cuts. I used solids, but if you choose to use prints, the result could be super cool too.

Get two pieces of solid fabric (8” x 20”) in a different color. Place them on top of the first piece, centering them so that a little background fabric peeks out on either side, lengthwise.

Choose one thread color from the pack and stitch down the long sides of the unit to secure the pieces together.

Using the edge of the presser foot as a guide, stitch lines down the length of the piece, spaced about 1/2 inch apart. Don’t try to make them perfectly straight - that little bit of natural tilt will give it the organic feel we’re going for. It’s fine if some are spaced further apart than others.

Press the piece to flatten it and set the seams.
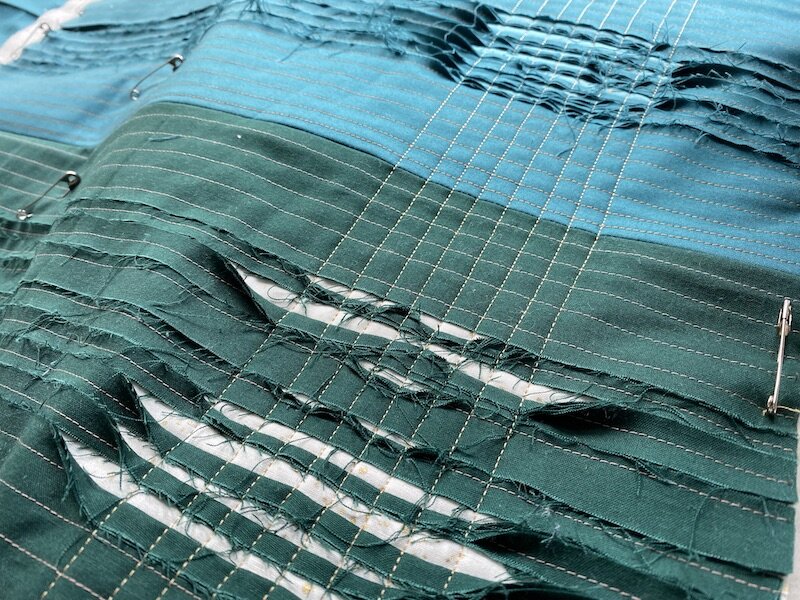
Set the OLFA cutter to the “small” setting and cut the center 6-8 rows of each strip (the 7-ish rows on either side will remain uncut).

To cut: carefully insert the cutter foot so that it is above the bottom (background) fabric but under the top two layers. Place the piece on a flat surface. Hold the background layer firmly and push it forward steadily, holding the cutter upright.

Once the center rows are cut, trim the piece to 20” long (trimming off the excess background on either side) and place it aside.
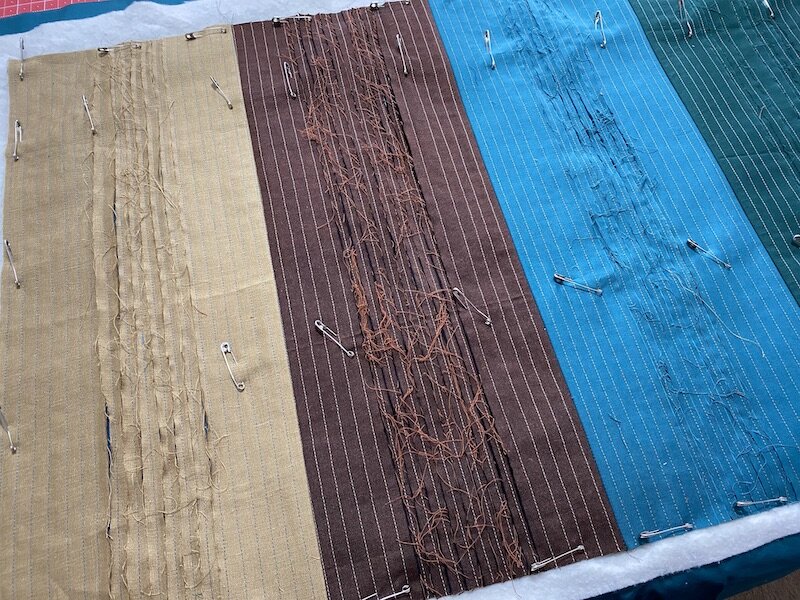
Repeat to make three more sections like this, each one with a different (but coordinating) fabric, and choosing a new Aurifil thread color from the set for each section.

Once you have four sections like this, arrange them side by side so that the long sides are together. Put the fringe sides together and piece them to make a quilt top that measures 20” x 30”.
Get batting and backing fabric that measures 24” x 34”, and lay the backing + batting + top together in a sandwich, with the top centered on the backing and batting.

If you pin baste, place pins in rows, leaving space for multiple long quilting lines.
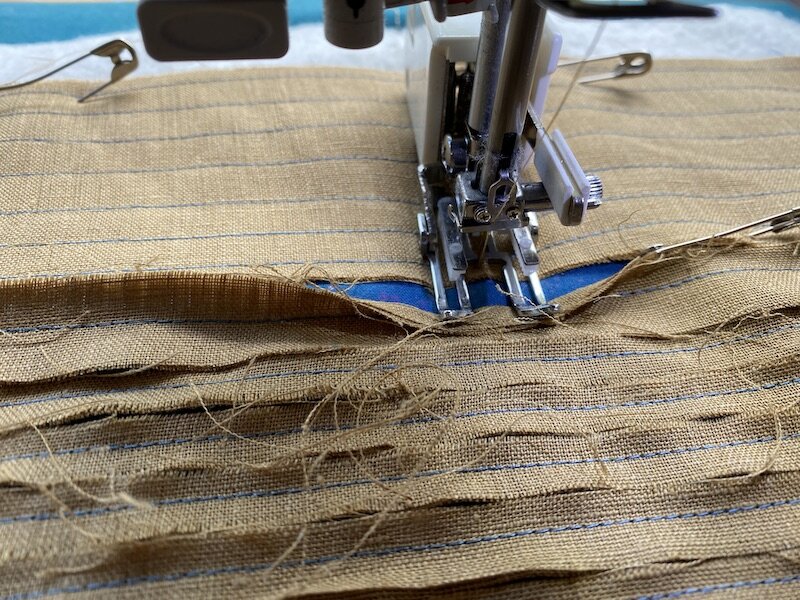
Using a walking foot if you have one, quilt across the length of the quilt, slowly holding open the chenille cuts as the needle gets to them. Use the foot to help you press them in the correct direction. When you stop, make sure the needle stops in the down position.
Sew 8 lines in the same direction on either side of the quilt, about 2.5” in from the edge and 1/4 inch apart.

Flip the quilt around and sew 8 lines down the length of the quilt in the center.

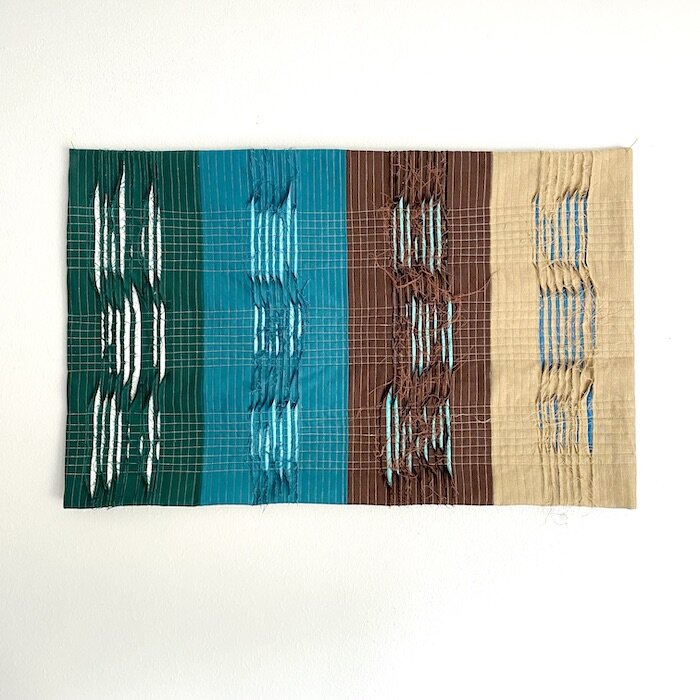
Sew 1/4 inch around the perimeter of the quilt. Trim the quilt to square up the edges. Bind or face it to finish.

You’re done! Use your quilt as a table decoration or add hanging tabs and turn it into a wall art quilt.
Happy quilting!
- Allie
